Macramé Wall Hanging Tutorial
Add some colour to your home this spring, and create your own macramé wall hanging.
Craft bloggers Tia and Laura, from Little Button Diaries, have made a colourful wall hanging using the art of macramé (knotting in patterns). Read on to discover how to make your own.
Tia & Laura’s Macramé Wall Hanging Tutorial
This attractive macramé wall hanging will brighten up any wall. It uses two basic macramé knots to build up the pattern. Once you’ve mastered the knots, the possibilities are endless. We’ve used a jersey fabric, as it doesn’t fray, but you could try another fabric or cord for your hanging.
The great thing about the macramé technique is if you make a mistake, it’s easy to unpick! If you haven’t tried macramé before, you can pick up some great tips and tutorials on YouTube to learn the basic methods.
You will need:
- 45cm (18in) length of dowel
- Jersey fabric in two colours (3/4 metre of each)
Step 1 - Cut your strips
Begin by cutting the Jersey fabric into 1 inch wide strips from the length of your fabric. Cut 10 strips from each colour.
Begin by cutting your fabric into strips
Step 2 - Attach to the dowel
Place the dowel onto your work surface and attach the pieces of jersey onto the dowel using a luggage style knot. To do this, fold each strip in half and place the loop over the dowel. Pull the rest of the strip through the loop created and tighten up the knot. Starting from the centre, knot eight pink strips onto the dowel. Then add two blue strips onto either side of the pink.
Use a luggage knot
Start knotting from the centre, work your way out
Step 3 - Begin your square knotting
Now to knot! Take the 4 strands in the centre and knot them together using a square knot. To do this, take the far left strand, weave it over the two next to it and under the fourth one (see picture for reference). Then, take the far right piece and go under the two middle ones and over the forth one. Tighten up the knot by pulling the left and right strands until the knot reaches the top. Repeat this action but this time start with the right strand first.
Go over the middle two and under the fourth
Now do the opposite, from right to left.
Voilà! Your first square knot
Step 4 - Join your strips
Now you’re going to build up your pattern by using the square knot technique again. Skip each pair of jersey strips either side of your original knot, then take the next 4 strands and do another square knot either side of the middle knot, repeating step 3. From here, you are going to do another two square knots on either side working your way back into the centre. Make each knot hang a little lower than the last by not tightening it up to the top. When you are back at the centre do another square knot underneath your original knot.
Organised chaos, keep calm.
Step 5 - Bring in your lead cord
Next you’re going to create a diagonal line of knots using the blue cord nearest to the pink all the way across the other blue strands from both sides to the centre. This cord is called your lead cord. Take the first blue strand to the right of the pink and knot the blue strand over the pink. Repeat this and pull tight.
Do two knots on every strand using your lead cord. Take the same lead cord and move through each pink strand until you get to the centre. Repeat on the other side, starting with the blue strand to the left of the pink ones working to the middle. When you reach the middle four strands, square knot them together.
Start from the right
Repeat on the left side and word towards the middle
Step 6 - Square knot your diagonal lines
Starting with the outermost blue cord on both sides, do five square knots on each side working your way into the centre. Each square knot should be about an inch lower than the last to create a diagonal line.
Back to square knots
Step 7 - Create your centre line
Square knot the centre four strands of fabric together six times to create a downward line of knots.
Create the centre pattern
Step 8 - Tie your final diagonal line
Add another two blue strands of jersey to each side of the dowel. Create a line of diagonal knots (see step 5) from the outer edge working into the middle from both sides. Start with the blue strand on each end as your lead cords.
Add two more strands to each side of the dowel
Your diagonal lines should meet in the middle
Step 9 - Trim to size
Trim the excess fabric at the bottom to form a point in the middle.
Trim down to size in a V shape
Step 10 - Tie your hanging loop
Finally, make your hanging loop. Fold a strip of pink and blue in half and tie onto the dowel between the pink and blue knots using a luggage style knot (see step 1), with the strands pointing upwards. Tie on another pink and blue pair to the other side of the dowel, then tie the four strands of Jersey together at the ends.
The last two knots
You’re done!
You’re now a macramé master
Choose somewhere to hang it
A versatile decoration
Macramé ideas from Rex London
Macramé can be functional, as well as decorative.
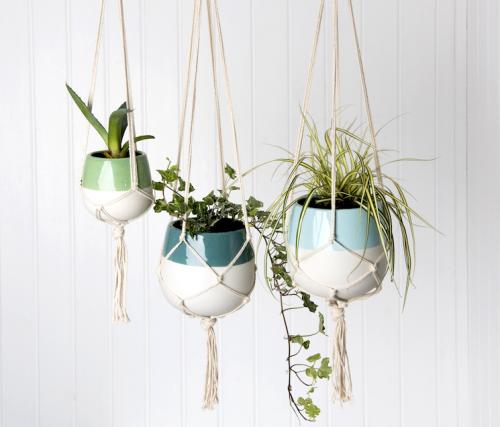
Our stylish ceramic plant pots hang in rope macramé netting, available in small and large sizes. Both sizes are available in baby pink, sea green, aquamarine, petrol blue, and sage green.
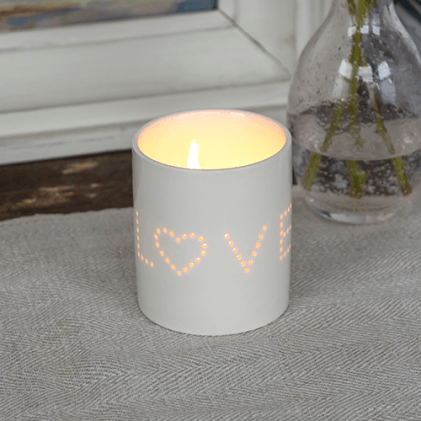
Take a look at our Paloma Ceramics range to mix and match your favourite colour of plant pots, posy vases, candle and tea light holders.

Pictured above from left to right: Small Sage Green Dipped Macrame Plant Pot - £8.95, Large Petrol Blue Dipped Macrame Plant Pot - £14.95, Large Aqua Marine Dipped Macrame Plant Pot - £14.95


